
Jessica Kosinski, Sales Enablement & Product Specialist at Skill Struck, hosted a webinar showing the process she would follow to create a lesson plan using Skill Struck’s Learning Activity Generator. Her presentation was packed with helpful tips for how to use the generator, Skill Struck’s playground account, HTML syntax secrets, and teaching advice. It’s worth a watch - see the whole presentation here.
Jessica gave the Learning Activity Generator a prompt for a reflective informational writing activity for 8-year-old students. The generator gave her a list of materials she would need, an introduction or overview of what the activity would be, an activity, and a conclusion. Using the information the generator provided her, Jessica was able to personalize and perfect the activity for the classroom. She also added an HTML element, easily making this lesson cross-curricular. Below are the steps she used to create a lesson using the Learning Activity Generator.
Step 1: Learning Activity Generator
To begin, go to skillstruck.com/generator and fill out the prompt provided on the left side of the screen.
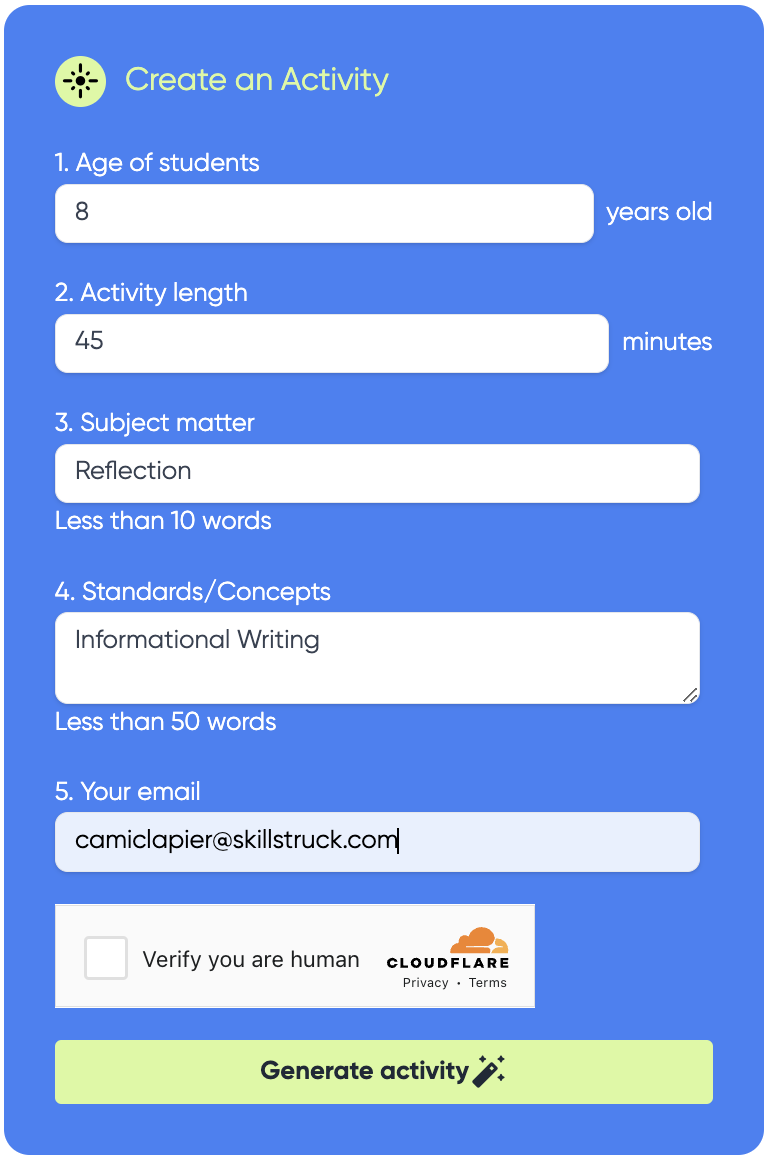
Our activity generator asks for five inputs:
- Age of students (input their age, not their grade).
- Activity length in minutes.
- Subject matter.
- Standards/Concepts: you can plug in multiple standards or concepts to create a cross-curricular activity.
- Lastly, your email.
It will take a moment for the generator to think through your request but once it has, it will provide you with the results right there on that same screen.
Tip From Jessica: Be Creative
“I have really enjoyed being creative using this generator. Play around with it and make as many as you want. Remember to download the ones that you love.”
It’s also important to remember that AI tools like this are great for getting juices flowing and jumpstarting your creative process. But what really makes a lesson or activity successful in the classroom is the teacher. AI can not understand the student's needs, interests, or abilities as a teacher does. So get in there, play around, and add your own magic to the activities it generates.
Jess found two sentences particularly insightful and helpful from the generator’s response: “Remind students to use descriptive language and emotion to make their writing engaging. Allow enough time for students to complete their entries, and encourage them to share their work with a peer or group if possible.”
Tip From Jessica: Peer Feedback
Practicing kind and constructive peer feedback can happen during multiple steps of this project.
They can review each other's work after they finish writing up their reflection: Did they use descriptive language and emotion? Check for spelling errors, etc.
They can peer review again after students create their HTML website: Is the font too big or too small? Do the font colors stand out so it is easy to read and understand?
The next step was to create planning tools.
Step 2: Planning Tools
Jess created a graphic organizer that students could use to compile their thoughts and the message they wanted to share for their reflection project. For this, you could reflect on many different subjects or events. For example: end of school year, Christmas Break, recess, weekend, nature walk, assembly, back to school, etc. She had them create a title, an introduction, a body paragraph, and a conclusion.
Tip From Jessica: Plan Messaging First
“This is a really important part because you don’t want students to go directly to a device, especially if they are new to HTML. Make sure that they have some time to plan their content over on paper so students don’t have to come up with content as they are also learning HTML.”
Once the students have reviewed and finalized the message of their reflection project it is time to introduce HTML.
Step 3: Adding in HTML
So what is HTML?
HTML is a programming language used to create websites. HTML stands for Hypertext Markup Language. Markup languages are used to tell the computer what to display and how to display it on a website. Learning HTML is the first step to making a website.
Tip from Jessica: HTML has multiple use cases
“You can use HTML in a variety of different ways, like note-taking or journaling. If you are ever wondering how to pull computer science into any classroom, something super simple is note-taking or weekly reflections with HTML.”
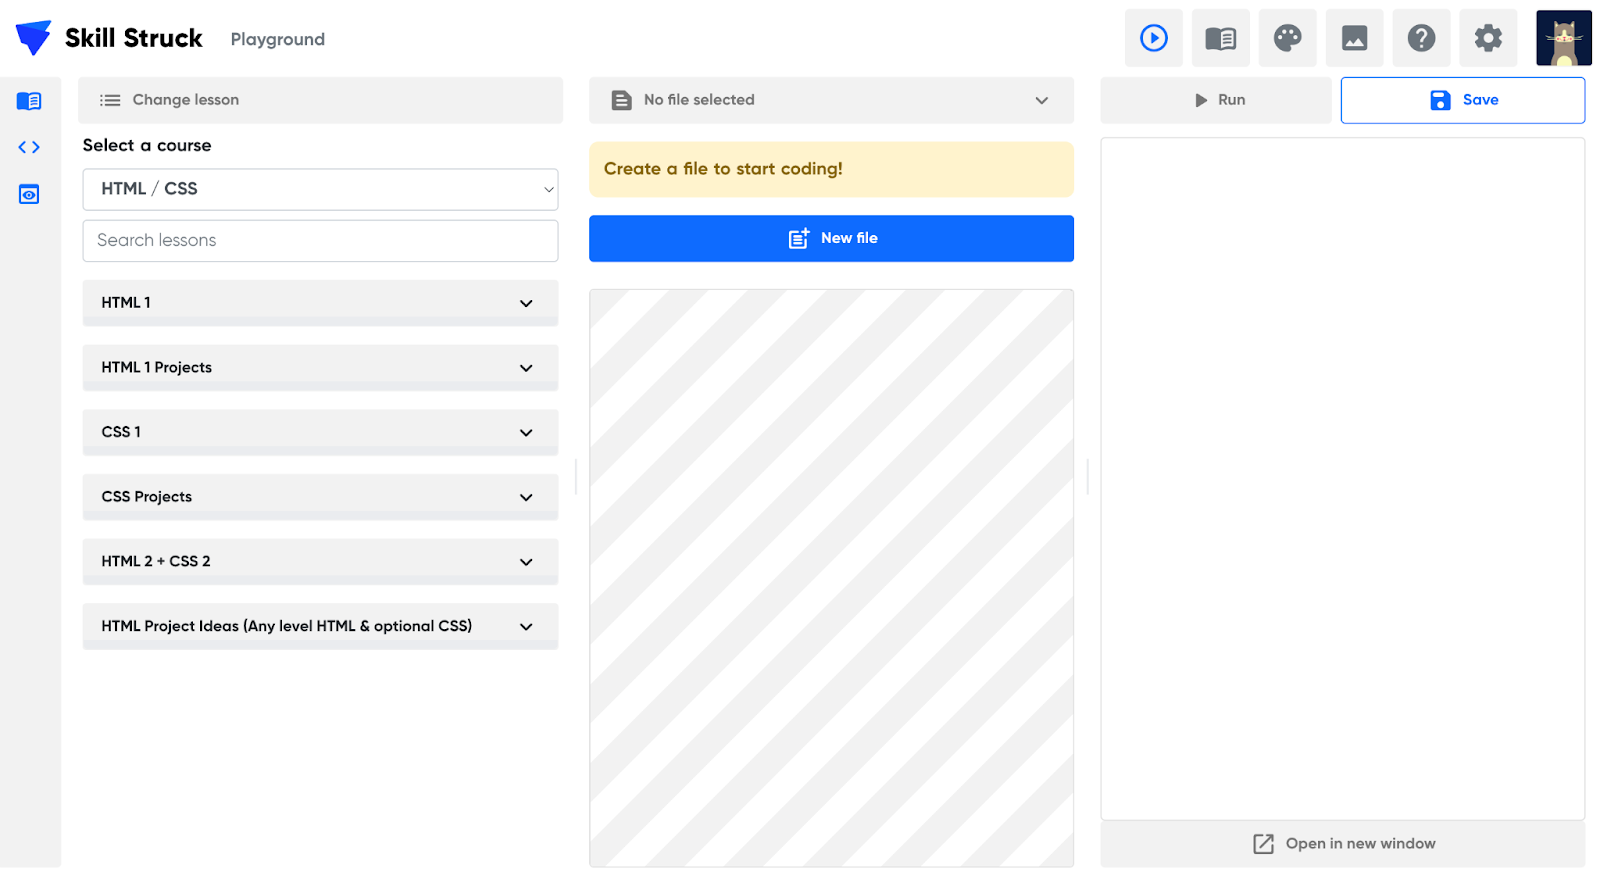
Using our playground link provided here, you will have limited free access to Skill Struck’s code editor which looks like this.
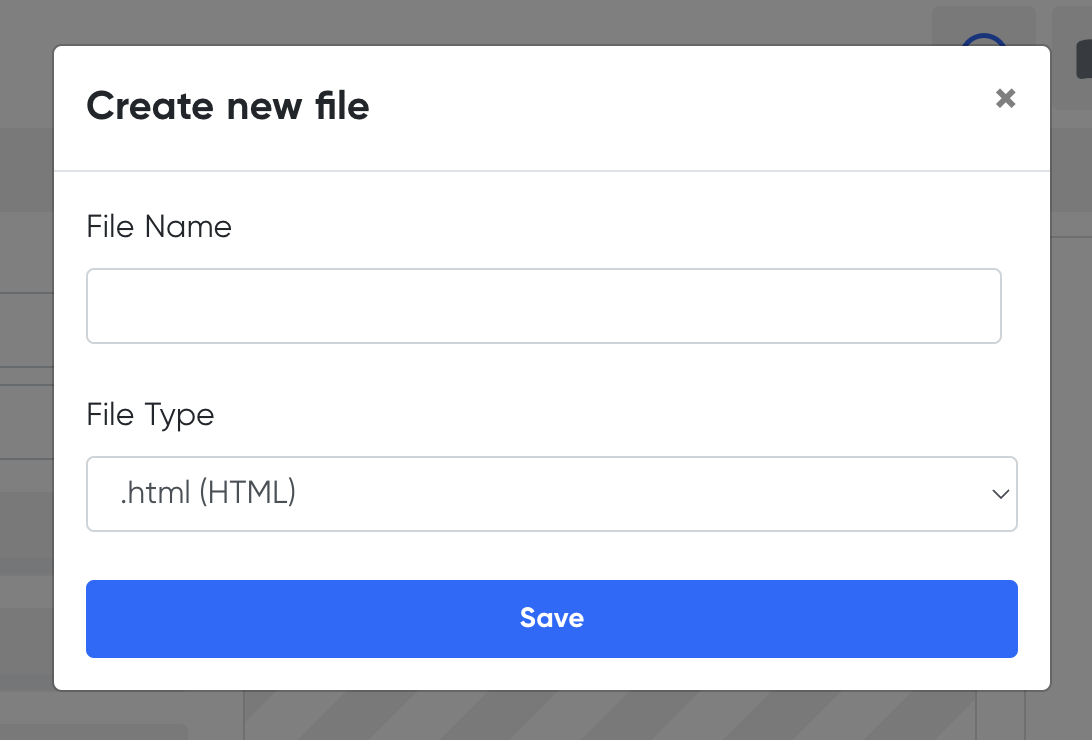
To begin, have your students start by clicking the bright blue new file button in the center. Have them name their new file and then make sure they select the HTML file type.
Encourage your students to create headers, and use font colors and styles. If these are brand-new concepts for you, no sweat! The textbook (found on the left column) of our code editor provides instructions on any HTML concepts needed to complete this assignment. And our custom hints will support your students as they are learning to debug their code. Jess also gave wonderful step-by-step instructions in her presentation.
Tip From Jessica: HTML can be integrated into any subject!
“My very favorite thing about HTML is you can create a website about anything, the other great thing about HTML is students can add their personality with text color, fonts, pictures, background colors, and more! HTML really brings things to life and takes things to another level.”
Try building your first lesson plan using our Content Activity Generator (powered by AI) here.
Leave Your Comment Here